Punch Needle Pillow Cover Guide

The Punch Needle Pillow Cover kit is one of my most popular products. It has been more than 2 years since I released the first version of this kit. During that time, punchneedle embroidery has continued to evolve, so what you have here is an updated version of the Guide, filled with the best tips, tricks, and techniques I’ve learned along the way.

With this cushion cover project, we’ll be creating a design that is beautiful, inspiring, and highly educational at the same time. Why educational? Because we won’t be using just one type of punch needle stitch to create the design—we’ll be combining several different techniques in a single project.

This is an easy and enjoyable way to explore almost everything punch needle embroidery has to offer. With just one project, you’ll get hands-on experience with what feels like 90% of the techniques used in punch needle embroidery.

If you have any questions during the learning process that are not covered in this Guide, please don’t hesitate to message me on Instagram. I’ll be happy to help.

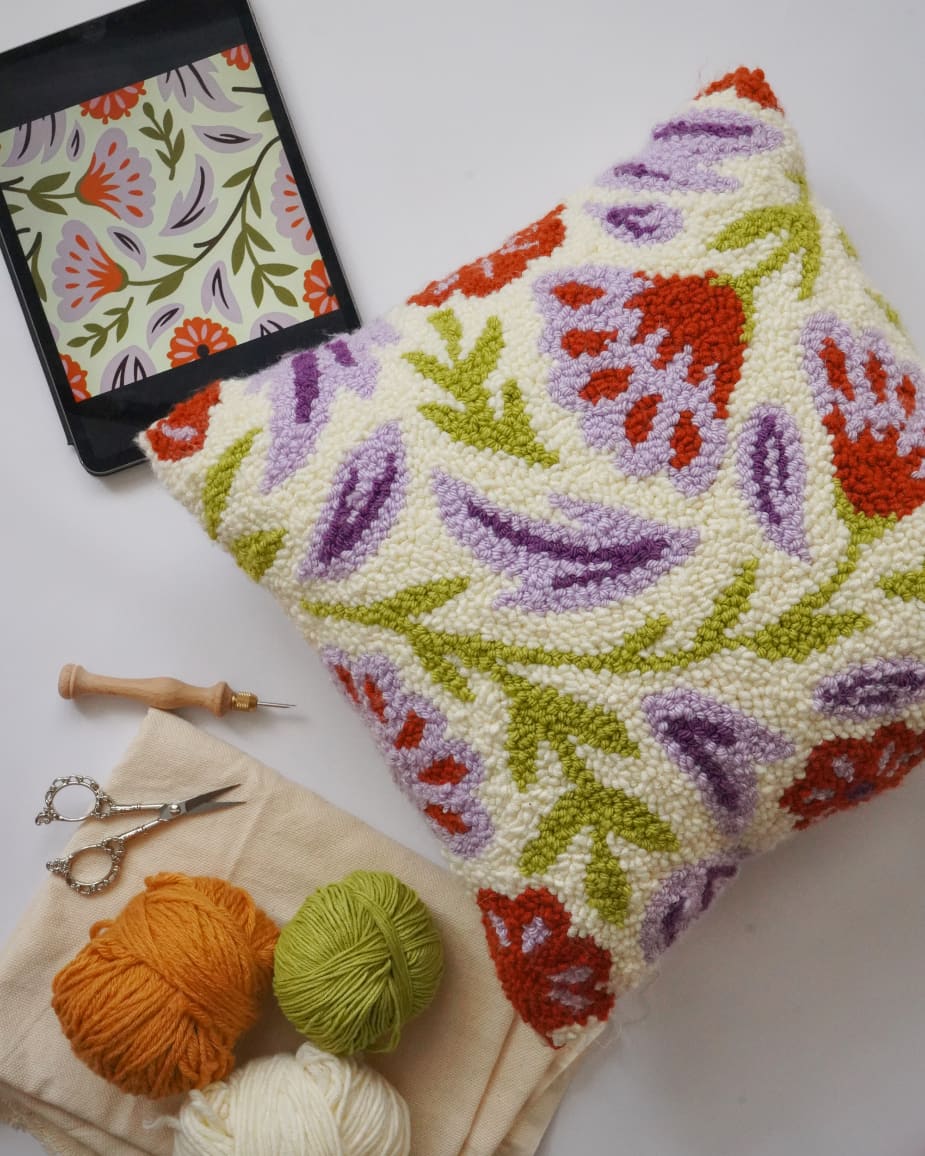
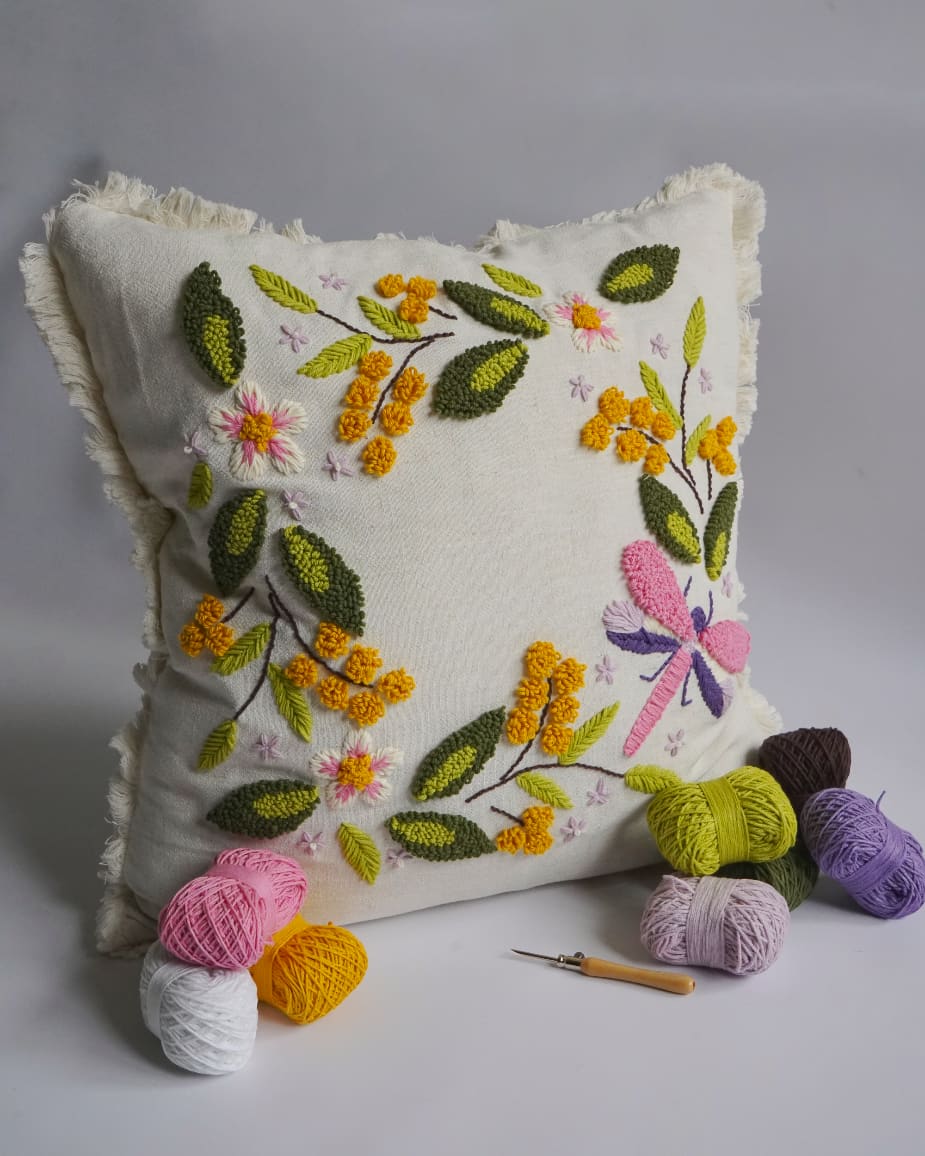
Let’s start with a little inspiration 🙂 Below are a few examples of projects that can be created using the same techniques described in this Guide. These are all punch needle cushion covers, and they look absolutely beautiful, don’t they?

    What Tools Will We Use?

    • A 2 mm Lavor Punch Needle

      *** The 2 mm needle is included in the set of 1 mm, 2 mm, and 3 mm needles. The 2 mm and 3 mm needles are the most popular choice among punch needle artists. They are medium-sized compared to all available punch needles, create beautiful loops, work equally well for a wide variety of projects, and cover about 90% of embroidery needs.

      A little bit of theory: punch needles are available in diameters ranging from 1 mm to 5.5 mm. The smaller the needle diameter, the finer the yarn you will use, and the smaller and more delicate the embroidered loops will be.

      For example, when making rugs, we usually want plenty of texture and volume so that the rug looks thick, fluffy, and plush. For projects like these, I recommend using a 5.5 mm punch needle. It works with thicker yarn and creates larger, fuller loops.
      On the other hand, needles with diameters up to 3 mm are ideal for smaller projects such as brooches, hair clips, jewelry, and other decorative accessories.

    • Needle Threader

      All Lavor punch needles come with the brand’s original needle threaders. However, they are made of copper and are not particularly thin. It takes a bit of patience and precision to insert them into 1 mm or 2 mm needles.

      That’s why your kit also includes an additional ultra-thin, easy-to-use needle threader that makes threading much more convenient.

    • Ready-Made Cushion Cover

      *** in the future, for punch needle embroidery, you can choose the basic foundation fabric. It is suitable for stitching anything from brooches to rugs and works well with any type of punch needle.

      Another beautiful option is colored fabric. For example light blue, olive, or lavender fabrics make wonderful background colors for your projects.

      The weave of the fabric is what holds the loops in place. The density of the fabric also affects your experience: the denser the fabric, the harder it is to pierce with a punch needle — which means your hand will get tired faster.
      On the other hand, dense fabric looks great as a background. You don’t need to cover them completely with stitches, and they won’t show through. However, dense fabrics can only be pierced with thin needles (1-3 mm).

      Punch needle backing is typically an open-weave fabric made of cotton, linen, or a cotton/poly blend, and has between 12-14 holes per inch.

      I always encourage experimenting with different fabrics to find what works best for you. Here’s a simple test:

      • Poke a small hole in the fabric using your punch needle.
      • Then gently rub the area around the hole with your fingers.
      • If the fabric threads “close up” and cover the hole — it means the fabric is suitable and will hold the yarn well.
    • Q-Snap frames 17*17 inches 

      *** Let me explain a bit more about the hoop frame. For punch needle embroidery, I strongly do not recommend moving the hoop over an already stitched area.

      First, it will interfere with your work. During punch needle embroidery, it is essential to maintain strong fabric tension. The punch needle applies considerable pressure to the fabric, and repeated punching can cause the fabric to slip, reducing the tension. If you also try to fit the embroidered loops under the hoop clamps, the hoop will no longer be able to hold the fabric securely. As a result, the loops on the back side will become uneven, and stitching will be more difficult because a tightly stretched fabric is much easier to punch through.

      Second, it is very difficult (almost impossible) to close the hoop over completed embroidery. It will also damage the appearance of your work by flattening the loops.

      That is why I always recommend choosing a hoop that is 5–6 cm larger than the design you plan to punchneedle.

      This kit is unique because it includes a great large frames. It is large enough for embroidering pillows, cushion covers, and, of course, smaller projects such as coasters, vase covers, handbags, and more.

      For rug making, however, you will need a large frame. You have two options: either staple the fabric onto a simple wooden frame using a staple gun, or build a frame with gripper strips that allow you to move the embroidery as you work (I demonstrated how to make such a frame here). The most convenient and professional option is a ready-made wooden frame with gripper strips. It allows you to move the fabric freely and embroider projects of virtually any size.

    • Etrofil Jeans and Cotton Eight Yarn

      *** These yarns are made from a blend of cotton and acrylic and come in a beautiful range of vibrant colors.

      A quick bit of theory: the fiber content of the yarn does not matter for the embroidery process itself. You can do punch needle embroidery with virtually any yarn. The fiber content only matters if it is important to you personally — for example, you may want an acrylic brooch or a cotton rug. For the embroidery process, the only thing that really matters is the thickness of the yarn

      The main thing to know is that the thread must move freely in the needle. If the thread moves freely and does not have to be pulled through the needle, the thread fits.

      If the yarn is too thin for your needle, it will fall out of the fabric. Here’s why: the needle punches a hole roughly the size of its own diameter. If the thread is too thin, it won’t fill that hole and form a proper loop. You’ll notice right away if your yarn doesn’t fit:

      • If the yarn feels tight inside the needle,
      • Loops won’t form properly on the back of the fabric,
      • It will seem like the needle is “holding” the yarn, and when you pull the needle out, the thread comes with it.

      How to choose yarn by knitting needle size?
      I’ve come up with a helpful system for choosing the right yarn for punch needle embroidery based on the knitting needle size indicated on the yarn label. Most yarn labels show an icon with two crossed knitting needles, and a number above it — that number tells you the recommended knitting needle size for that yarn, which also reflects its thickness. This info is printed on yarn packaging or listed in product descriptions online.

      1. For punch needles 2 and 3 mm (like those included in the Lavor 1-3 mm set), use yarns with knitting needle size 3-4 (for example, YarnArt Jeans, YarnArt Ideal, YarnArt Elite, Alize Cotton Gold Hobby, Kartopu Hola, YarnArt Begonia, YarnArt Style, YarnArt Cotton Soft).
        For 1 mm punch needles use 6 strands of embroidery floss or yarn with needle size 1-2.
      2. For 4 mm punch needles use yarns with needle size 4-5 (for example, Alize Alpaca Tweed, Alize Real 40 Plus, Alize Alpaca Royal, Alize Merino Royal, YarnArt Charisma, Gazzal Baby Bamboo).
      3. For 5 or 5.5 mm punch needles use yarns with needle size 6-7 (for example, YarnArt Merino Bulky, Nako Sport Wool, Alize Superlana Midi, Vizell Baby Smile).

      Another frequently asked question is: how do you calculate how much yarn you will need for a project?

      Unfortunately, there is no reliable formula for that. Punch needle embroidery is a highly creative craft, and every maker has their own stitching style. Some people work with a needle setting of 2 cm, while others use 5 cm, resulting in shorter or taller loops. Naturally, this affects yarn consumption. In addition, everyone will use different stitch lengths and different levels of stitch density when filling the fabric. All of these factors have a significant impact on how much yarn is used.

      So the best advice is simply to accept that you’ll always have plenty of yarn at home, because you’ll probably end up buying extra just to be safe 🙂

    • Disappearing Fabric Pen for Sketching Designs

      *** In the future, you can use either this pen or refill cartridges with disappearing ink. The main advantage of this type of ink is that it disappears when exposed to heat. This is especially important for designs with an open background (like our pillow cover project).

      If you accidentally draw an extra line or need to remove unwanted outlines after finishing your embroidery, simply apply heat to the ink with a hair dryer or a warm iron. The markings will disappear.

      Of course, you can also draw your design using a regular pencil, pen, or marker. However, in that case, any unwanted lines cannot be removed afterward. More importantly, when stitching with light-colored yarn over drawn lines, the yarn may absorb the ink. Instead of a clean, light-colored embroidery, you may end up with stitches stained by the markings underneath.

    • Glue for Finishing and a Brush for Application
      (I’ll explain the finishing process in more detail in the section about securing your embroidery)

    • Thread Snips

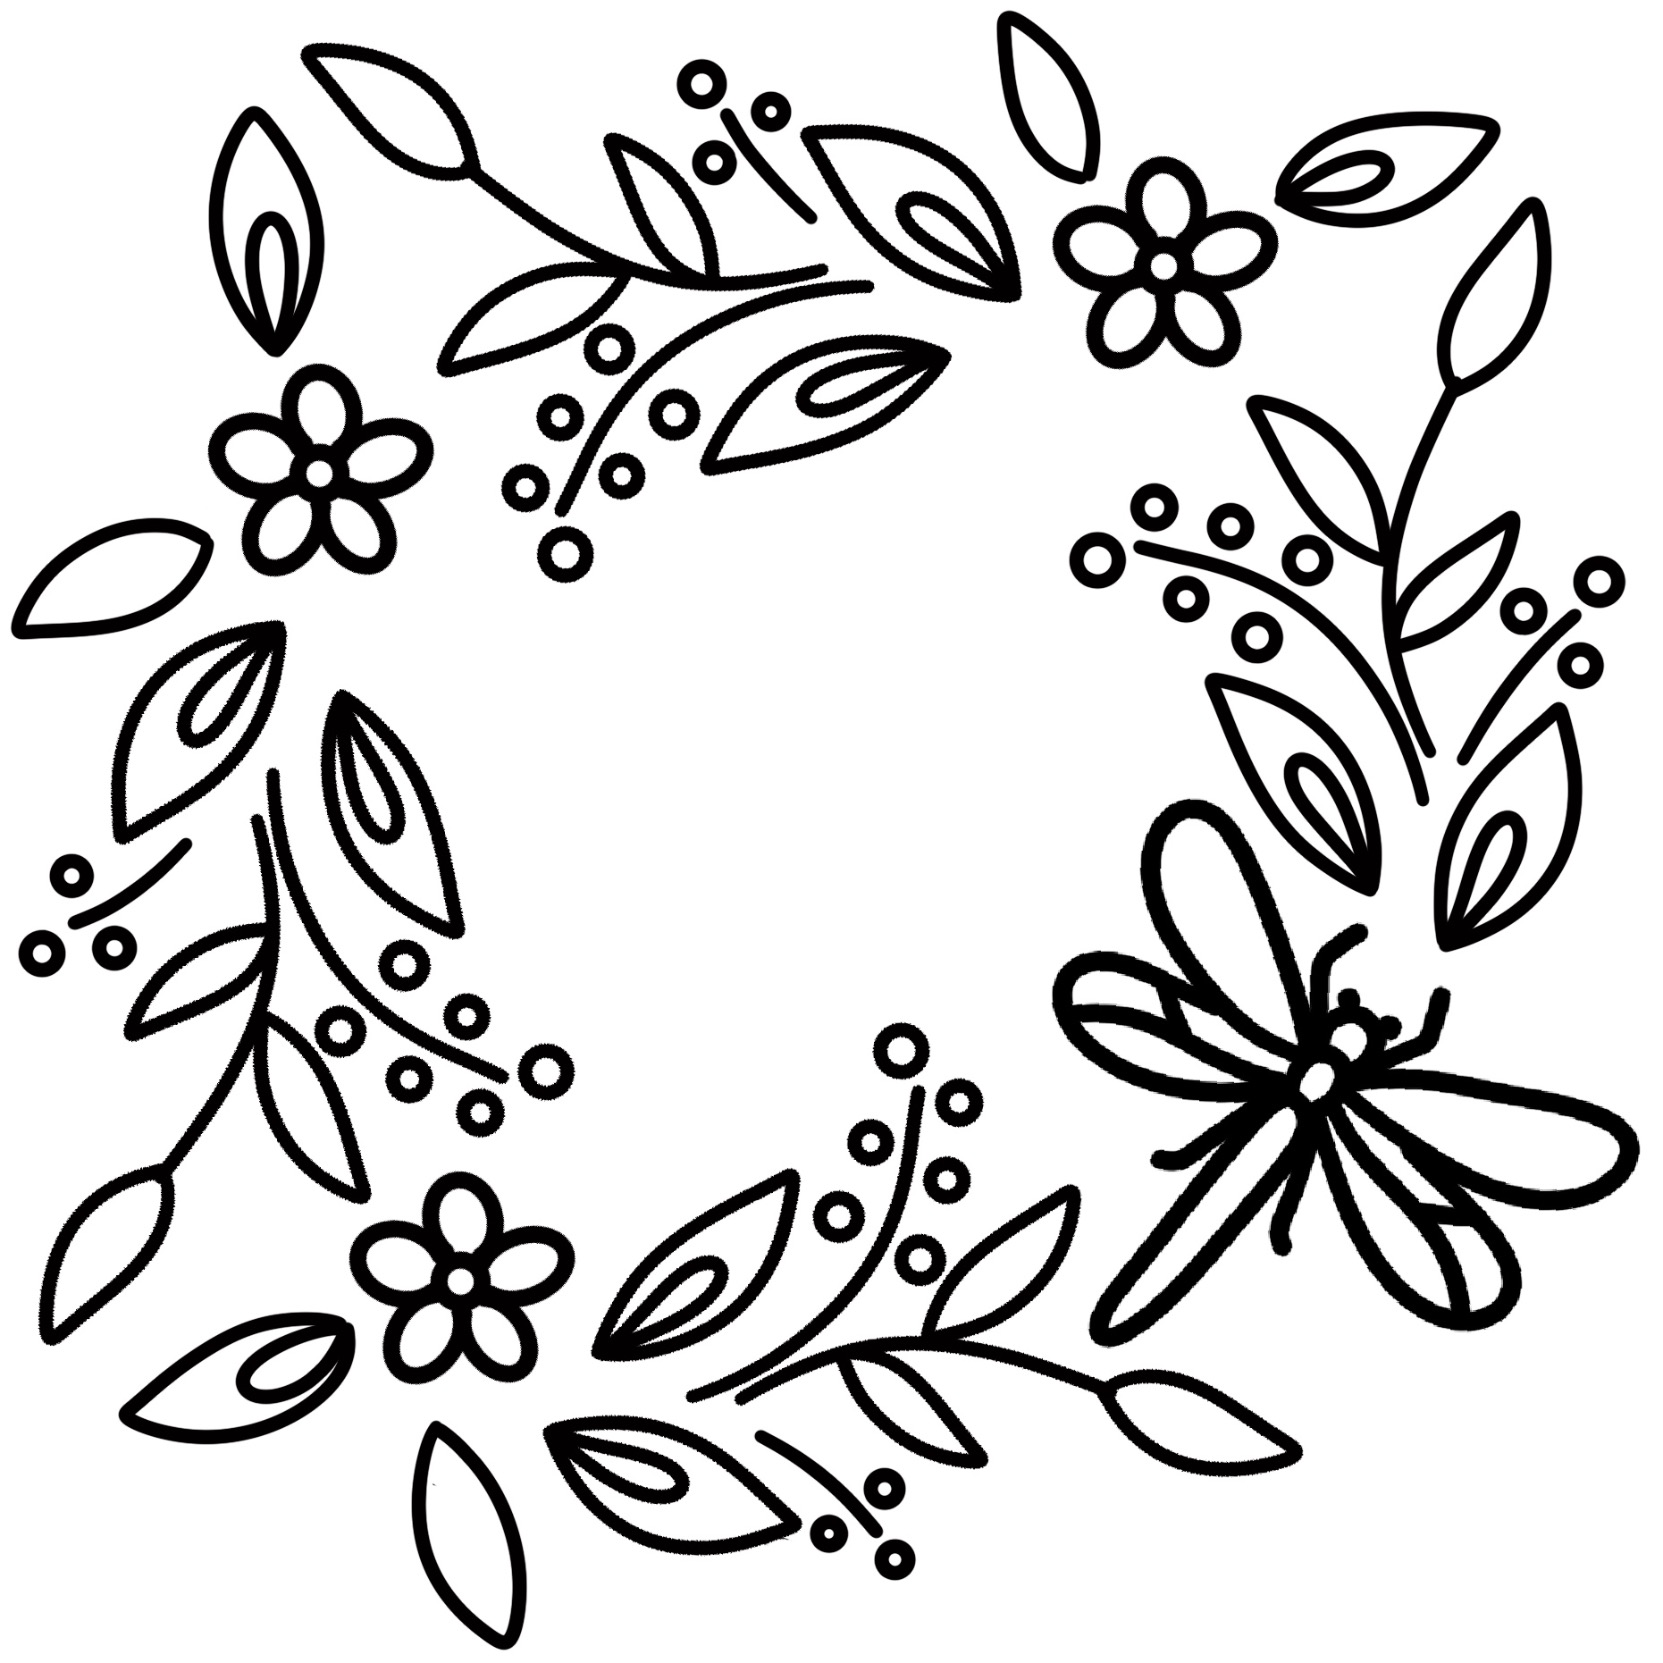
    • Embroidery Pattern

      In addition to the printed version of the pattern included in the kit, you can also download a digital copy by clicking the button below.

    1. Transfer the Pattern onto the Fabric

    First, stretch the pillow cover onto the frames. It is always much easier to draw on taut fabric.

    Important: Strong fabric tension is essential for neat punch needle embroidery. The fabric should be stretched as tightly as a drum. A punch needle applies much more pressure to the fabric than a regular embroidery needle used for cross-stitch, for example. If the frame is not sturdy enough, the fabric will gradually slip while you work. This makes it harder to punch through the fabric, causes uneven loops, and results in a less tidy finished piece.

    That is why I always recommend using high-quality frames that can withstand the pressure of punch needle embroidery. 

    Your frame kit includes 4 hollow tubes and 4 clamps. Insert the tubes one by one inside the pillow cover and assemble them into a square frame from the inside. Then attach the clamps from all four sides. Finally, twist the clamps slightly to tighten the pillow cover around the inner frame and create proper tension.

    The best tool for transferring a design onto fabric is light. If your project is relatively small, you can open the image on a tablet, TV, or computer screen, place the fabric over it, and trace all the lines.

    My favorite method is using a TV. It’s the fastest and one of the most convenient options. I display the image on the TV using the Screen Mirroring feature (available on most modern TVs), place the fabric over the screen, and trace the design.

    You can do the same, or you can tape the printed pattern from the kit to a window, then either tape the stretched pillow cover over it or simply hold it in place while transferring all the lines onto the fabric.

    If you’d like to learn more about transferring designs in the future, you can watch this video, where I explain several different methods.

    What should you use for tracing?

    I always recommend using a disappearing fabric pen. It is especially useful for designs with an open background or projects stitched with light-colored yarn, where it is important that no drawing marks remain visible.

    If you accidentally draw an extra line with a disappearing pen, you can easily remove it using a hot iron or a hair dryer. These pens contain heat-sensitive ink that disappears when exposed to high temperatures. Another advantage is that the ink will not transfer onto the yarn during stitching.

    When using markers, felt-tip pens, or pencils to transfer designs, there is always a risk that light-colored yarn may pick up the pigment as you stitch over the drawn lines. A disappearing pen eliminates that concern completely.

    One more important note: pay attention to the position of the zipper on the pillow cover — it should be at the bottom. Also, try to center and align the design as evenly as possible on the pillow cover before tracing.

    Some parts of our design will be stitched as loops, while others will be stitched as flat stitches. This is one of the unique features of punch needle embroidery — it is a double-sided technique. But we’ll talk more about that later.

    For now, we need to transfer to the back side of the pillow cover the elements that will be stitched as loops. To create loops on the front side, we need to work those sections from the back.

    There are several ways to do this:

    • The easiest method is to simply look at the design on the front side and redraw the necessary elements on the back. Keep in mind — we’re not entering a drawing competition! The lines don’t have to be perfectly neat at this stage. Once the embroidery is finished, we’ll refine and clean everything up.
    • Another option is to trace over the sections that need to be transferred with a thicker, darker line. Then place the pillow cover against a window or shine a flashlight through it from behind. Using the light, you’ll be able to see those lines through the fabric and redraw them on the back side.

    In the video below, I demonstrate both of these methods.

    As you saw in the video, we now place the pillow cover back onto the frame, but this time with the wrong side (the inside) facing outward. That’s because we’ll begin by working on the back side and stitching the loop sections first.

    2. Preparing the Needle

    We will stitch this design using the 2 mm needle, which is the medium-sized needle included in the kit.

    Insert the needle into the handle so that 2.5 cm (1 inch) of the needle remains above the handle. This is a medium loop height that creates nicely sized loops while also allowing the yarn to stay securely in the fabric.

    The lower the needle is set, the shorter the loops will be, and the easier they can be pulled out of the fabric. As a general rule, the loop height is approximately half of the exposed needle length. So, with the needle set at 2.5 cm, your loops will be about 1.25 cm high.

    This needle, along with some of the others in the kit, features an adjustable loop-height function. In future projects, feel free to experiment by setting the needle higher or lower in the handle. Different settings will create loops of different heights, allowing you to add texture and dimension within a single piece of embroidery.

    Once the needle is positioned correctly, secure it by tightening the screw on the handle.

    To thread the needle, insert the loop of the threader into the hole at the tip of the needle. Then continue feeding the threader all the way through the hollow needle until you can see the loop emerge from the bottom.

    Use the thin threader that was included separately in your kit. The Lavor needle also comes with its own threader, but it is made of copper and is thicker, making it less convenient to use. I recommend keeping it as a spare.

    Insert the end of the yarn color you will be using into the loop of the threader (we will start with the light green yarn).

    Do not cut off a separate length of yarn. Instead, thread the needle directly from the skein. In punch needle embroidery, there is no need to work with pre-cut lengths of yarn — we will always stitch using yarn directly from the ball or skein.

    Pull the threader through the needle, bringing the yarn with it. Leave about 5–10 mm (¼–⅜ inch) of yarn extending from the tip of the needle. There is no need to leave a longer tail.

    For a better understanding of the threading process, watch the video below.
    3. Embroidering the Design

    Unlike cross-stitch embroidery, punch needle embroidery does not have strict rules. Punch needle patterns are similar to children’s coloring pages, and our goal is to embroider each element separately so that, in the end, we essentially “color in” the entire design with yarn.

    What Makes This Punch Needle Kit Special

    In general, punch needle embroidery is created with stitches that always form loops on the reverse side of the fabric. However, to make the finished piece more interesting, we combine loops and flat stitches, as well as incorporate more advanced decorative stitches. As a result, the front side of the embroidery will feature a variety of textures and elements, including stitches, loops, leaves, and flowers.

    Before starting any embroidery project, it is important to decide which stitch techniques you want to use. Will the entire design be embroidered with loops? Will some areas be made with loops and others with flat stitches? Or will it be a more decorative floral composition featuring a variety of stitches, flowers, and foliage?

    I design each of my kits with the goal of teaching you all of these techniques in a single project. By completing one kit, you will gain a solid understanding of how to create each of these stitch variations, giving you many more embroidery techniques to use in your future projects.

    Embroidery made entirely with loops is the perfect option for rugs. If desired, the loops can later be trimmed to create a cut-pile texture.
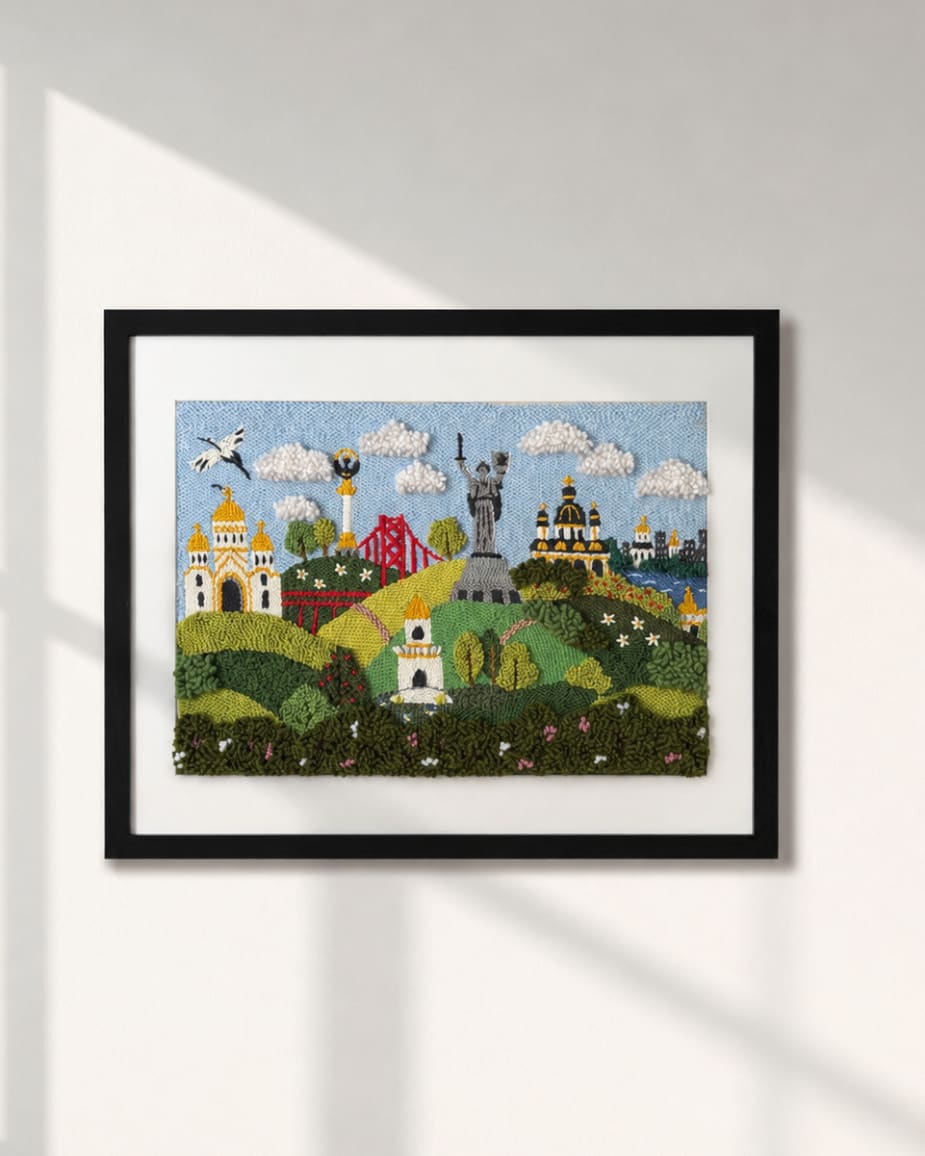
    Wall hangings are a very popular type of punch needle project. They are usually embroidered using a combination of loops and flat stitches, and you can mix these techniques in any way you like.
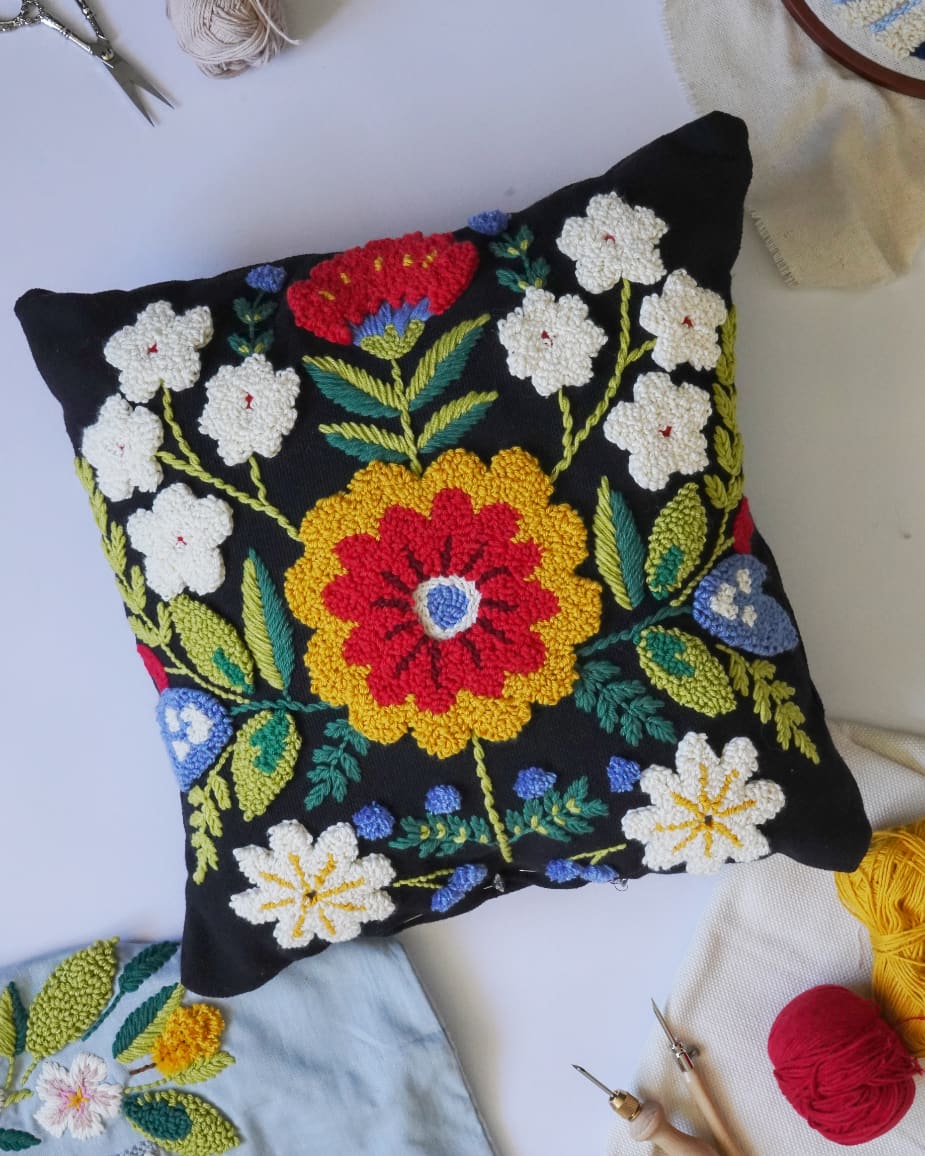
    Floral cushion covers are currently very trendy, and this is where we can use every technique available — loops, stitches of different lengths, flowers, leaves, and other decorative elements.

    Our design combines multiple techniques, so we will learn how to create all of them. It is always easier to begin with loop embroidery because loops are stitched from the reverse side of the fabric. As you continue working, you will see them on the front side as finished elements. This minimizes the risk of accidentally piercing the loops with the needle or pulling out the yarn while embroidering.

    We will start by embroidering the dark green leaves with light green centers. But first, let’s cover a little more useful theory.

    How Does Punch Needle Embroidery Work?

    Punch needle embroidery works as shown in the illustration below. The side you are looking at while stitching will always show the flat stitches (the smooth side). On the opposite side, loops will automatically form.

    The height of the loops depends on the length of the needle setting: the longer the needle, the longer the loops will be, and vice versa.

    Therefore, if you plan to create a project that combines both stitches and loops, you will need to turn your work so that you are working from either the front or the back side, depending on the technique you are using.

    Our first elements (the light green centers of the leaves) will be embroidered using loops. To create loops on the front side of the fabric, we need to stitch from the reverse side. That is why we have mounted the cushion cover in the hoop with the wrong side facing us.

    Loops are the basic, standard stitches used in approximately 99% of all punch needle projects. The thicker the needle and the yarn, the more dimensional and prominent the loops will be. The greater the needle height setting, the taller the loops will be. While loops can look very different visually, they are all created using exactly the same technique.

    In the photo I demonstrate this difference. The embroidery technique is exactly the same, but different needles are used, resulting in loops with different appearances.

    So, to create loops on the front side, we need to make stitches on the reverse side. During the embroidery process, we will be looking at the stitches, while the desired loops will form automatically on the opposite side.

    Begin by punching the fabric at any point along the outline of the element. Our goal is to “fill in” the shape with stitches, working in a spiral from the outer edge toward the center.

    Hold the needle with the beveled (cut) side facing forward, away from you. Even when changing direction, always keep the beveled side pointing in the direction of travel.
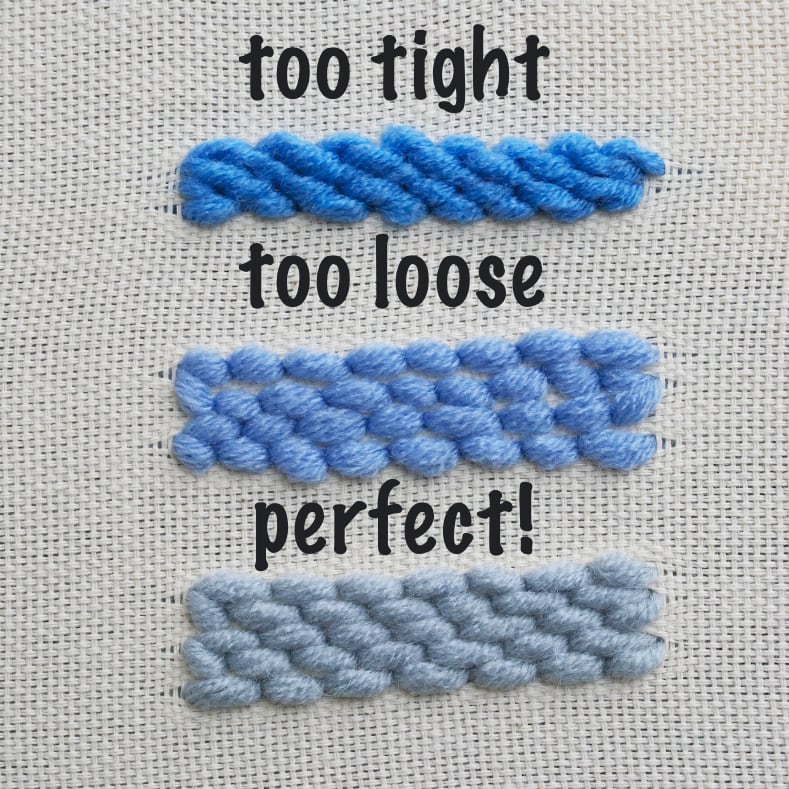
    Insert the needle completely into the fabric until the handle touches the surface. Pull it back out and, while keeping the tip of the needle lightly touching the fabric, punch it through again about 3-4 mm away. This 3-4 mm distance is one stitch — the needle’s “step.”

    Try to keep these stitches as consistent in length as possible, as this will make the finished embroidery look more even. Of course, this is not always possible. Curves, corners, and tight spaces may require shorter or longer stitches, and that is perfectly normal.

    A separate video demonstrates how to create these basic stitches.

    We embroider the stitches in a spiral, moving from the outer edge of the element toward the center. Arrange the stitches in a brick pattern, so that each stitch ends at the midpoint of the stitch in the adjacent row.

    It is also important not to overlap rows of stitches or leave large gaps between them.

    If you pack the yarn too densely, several things can happen. First, you will use more yarn than necessary (which increases costs). Second, the loops on the front side will vary in height because they will be too crowded in the fabric (which looks untidy). Third, you will create excess tension in the fabric, and once you remove the embroidery from the hoop, it may curl. (This can be corrected by pressing the back side with a hot iron through a damp cloth.)

    You can see perfectly placed stitches in the photo. There are no gaps, and the fabric is not visible between the stitches, while the stitches themselves do not overlap. To check your work, turn the embroidery over so the loops are facing you. If the fabric is not visible between the loops and they are all the same height, you are doing everything correctly.

    In any case, remember that our fabric is ideal for punch needle embroidery. If something goes wrong, simply pull out the yarn and remove the poorly stitched section. Then rub the area where the yarn was with your fingers to close the holes in the fabric. After that, you can embroider over the same area again.
    Once you have completely embroidered an element, simply cut the yarn. There are no knots in punch needle embroidery. We will discuss how to secure the embroidery later.

    Now embroider the light green parts of the leaves, then the dark green parts (all the leaves embroidered with loops), as well as the pink butterfly wings and the yellow circles. These are all the elements that we transferred to the back side of the pillowcase.

    Watch the process in the video.

    Turn the pillowcase back to the front side and enjoy the embroidered loops 🙂 The remaining elements will be embroidered on the front side using different types of stitches.

    Let’s continue with a short step: embroider the branches using dark brown yarn. These elements are stitched in a single row and will look their best if you make short stitches, as shown in the video.

    3.1. Embroidering the Butterfly

    Next, we will embroider the butterfly. This is a great element for learning additional decorative stitch techniques. We will divide it into several sections and embroider each one using a different type of stitch.

    The small section beneath the already embroidered pink wings will be worked with long parallel stitches. These stitches can be used not only for specific elements but also as decorative details throughout an entire project. For example, they are perfect for embroidering fences, rooftops, flowers, and many other motifs. In this video, I use the same stitches to embroider marigold flowers.

    For the butterfly, these stitches will be quite short, but in other projects they can be made much longer.

    What is important to keep in mind?

    These stitches are fairly delicate because they are longer than basic stitches and have fewer surrounding threads to help secure them. Therefore:

    • Make the needle setting slightly longer. This will create a longer loop on the back side, making the stitch easier to secure and less likely to be pulled out accidentally. There is no need to make the loops excessively long, as we will secure the embroidery with glue later. For now, the goal is simply to keep the stitches in place while you work.
    • If necessary, place your hand inside the pillowcase and hold the yarn from the back while making each stitch.

    It can also be helpful to draw the stitch direction on the element beforehand. I demonstrate this in the video, and it will become clear when you watch the process.

      I have also included a separate demonstration of this stitch technique below.

      These stitches are quite popular because they can be used to embroider virtually any element, regardless of its shape. (Spoiler alert: later on, we will also embroider the white flowers in the pattern using these same stitches.)

      Now embroider several sections of the butterfly wing (the white and purple areas) using long parallel stitches.

      Let’s finish embroidering the butterfly using both basic stitches and long parallel stitches. There will be a few important notes in the next video, so be sure to pay attention.

      The two circles (the butterfly’s head and body), as well as the legs and antennae, should be embroidered with regular stitches. The long pink tail should be worked with long parallel stitches.

      Let’s get started! 🦋

      3.2. Embroidering the Floral Wreath

      Now our task is to embroider the light green leaves and white flowers. We will stitch them using the same parallel stitches. As I mentioned before, these stitches are very versatile and allow you to embroider almost anything.

      If needed, draw guidelines showing the direction of the needle movement, and keep practicing to build your skills.

      3.2.1. Getting Creative and Adding More Flowers

      Embroidery is a very creative process. And the more you embroider, the more ideas come to you. Believe me, I personally spent most of my life as far away from creativity as possible. I have a law degree, and there are no artists, musicians, performers, or anyone involved in creative fields in my family. I could never draw, sing, or do anything particularly artistic. The only thing I was good at was my legal career, which is highly structured and organized. Punch needle embroidery became my evening escape after work, and my first projects were nowhere near what I am able to create today.

      So, why am I telling you this?

      In about 90% of my projects, new ideas come to me while I’m working—adding an extra element, moving something around, or changing a color. To show you an example, we are now going to embroider flowers that are not included in the original pattern. Later, you can also use leftover yarn to add extra leaves, branches, or flowers. Your imagination is the only limit.

      Draw a small five-petal flower anywhere on your design. These flowers will be tiny, but they will add extra charm to the embroidery.

      The stitches will be quite small, so to save yarn, lower the needle setting. This will create shorter loops on the reverse side and, consequently, reduce yarn consumption.

      4. Cleaning Up the Embroidery

      After completing any embroidery project, it is important to spend a few minutes cleaning it up. This applies to all types of punch needle projects—pillowcases, rugs, wall hangings, and everything else.

      • First, remove all trimmed yarn ends. Usually, as soon as I cut a yarn tail, I immediately push it to the back of the work so it does not interfere with embroidering other elements. However, while working on this pillowcase, I intentionally left some yarn ends on the front side so I could show you an example. If you also left trimmed yarn ends on the front side, carefully use an empty punch needle to push them through to the back. Once on the reverse side, trim all long yarn tails, as they may interfere with the next stage — securing the embroidery. In every project, we aim to keep the embroidery neat and tidy. Even the reverse side should be as flat as possible, without unnecessary bulk. Your goal is to remove as many excess yarn ends as possible.

      • Next, use the empty needle on the front side to adjust any loops along the borders between different colors. In our design, this mainly applies to the leaves embroidered with loops. If some loops have become tangled or overlap one another, gently move them with the empty needle and place them back where they belong. This is completely normal — during embroidery, loops often shift around, and the edges of different elements may start to look uneven. Simply correct them by hand, using the empty needle to separate the loops and reposition them.
      • If any loop stands higher than the surrounding loops, gently press the empty needle into the base of that loop and apply slight pressure. This will pull the loop back a little, reducing its height on the front side and helping it blend with the rest of the embroidery.
      • Finally, warm the entire pillowcase with a hair dryer or an iron to remove any remaining marks from the disappearing fabric pen.

      This is an important step for any embroidery project and adds a clean, professional finish to your work.

      5. Securing the Embroidery

      This is the stage that perfectionists probably won’t enjoy very much 🙂 Unfortunately, there are not many ways to secure punch needle embroidery, and none of them are particularly beautiful from the back.

      In fact, about 90% of punch needle artists do not secure their embroidery at all. They embroider clothing, rugs, pillows, anything you can imagine, and leave the embroidery unsecured. I have spent years studying this craft and continue learning from other makers. In their work, adhesives are typically used only for tufted rugs made with a tufting gun.

      From my observations, people tend to have a more relaxed attitude toward handmade products and fewer unrealistic expectations.

      However, one of the very first concerns people have about punch needle embroidery is: Will it come apart? How does it stay in place? What if a dog, cat, or child pulls on it?  How can a thread come loose from a pillow? How do you wash it? How can you use a product like that?

      I have been embroidering for many years and have developed a more relaxed attitude myself. I know that when the embroidery is done correctly—with proper technique, good tools, quality fabric that holds the yarn securely, and the correct loop height—the embroidery does not necessarily need to be secured. It can even be washed in a washing machine. (I recorded a video about this experiment quite a while ago.)

      At home, I have small children and a dog, so I try to minimize the use of chemicals whenever possible. Because of that, I rarely glue items intended for personal use. However, everything I make for sale is secured, and I recommend that you do the same.

      We will secure the embroidery using the special acrylic adhesive included in your kit. PVA glue and similar adhesives are not suitable because they are water-soluble and will not withstand washing. I have tested dozens of alternatives, including spray adhesives and sewing glues, but none of them hold punch needle embroidery as well—especially when working with yarn rather than fine thread.

      Interfacing and fusible stabilizers are not suitable either. Punch needle embroidery is quite dimensional, and these materials simply cannot provide enough support.

      What You Should Know About Securing Embroidery

      • The easiest way to apply adhesive is while the project is still stretched in a hoop. Turn the pillowcase inside out and place it back into the hoop.
      • Apply the adhesive in a very thin layer using a rubber brush. Adhesive naturally makes the embroidery stiffer and less flexible. To keep the finished piece soft and pliable, use only a thin layer. This is enough to secure the yarn without adding unnecessary weight.
      • Apply the adhesive directly to the embroidered areas, trying not to get it on the pillowcase fabric itself. If you are working with dark fabrics or delicate materials, adhesive may seep through the fabric and become visible on the front side.
      • Our goal is to bond the loops together. If you have a single isolated loop, simply place a small dot of adhesive on it—it will hold securely.
      • Leave the embroidery to dry for at least 12 hours, although 24 hours is preferable.
      • Keep the adhesive container tightly closed. Ideally, wrap it in plastic film as well. Limiting its exposure to air will prevent it from drying out too quickly.
      • This adhesive can also be used to attach a backing immediately. For example, you can attach felt to wall hangings or artwork, or apply a non-slip backing to rugs. Simply spread the adhesive, place the backing material on top, and leave it to dry.

      A Few Words About Punch Needle Embroidery on Clothing and Tote Bags

      You have now watched the video showing the securing process, and at this point you can clearly see why I do not recommend embroidering directly onto clothing or tote bags.Once the embroidery has been glued, the reverse side is not particularly attractive and can rub against your body or catch on items inside a bag. A lining is usually necessary.

      If you are an experienced sewist, then by all means feel free to embroider directly onto garments and add a lining afterward. However, I—and many beginners who are working through this Guide—am not quite that skilled with sewing.

      Another important consideration is that we cannot be sure whether the fabric used for the garment will hold the yarn securely. In many cases, it probably will not.

      For this reason, when working with clothing or tote bags, I recommend embroidering the design separately and then attaching it as a patch by sewing or gluing it onto the finished item. This approach is much more reliable and durable.

      And with that, our project is complete 🙂

      What’s Next?

      Using the same techniques from this Guide, you can now create any pillowcase, wall hanging, patch, rug, cushion, or any other project you can imagine. The process will be exactly the same.

      You already know all the fundamentals, and you can always return to any video and watch it again whenever you need a refresher. Your access to this Guide is unlimited and does not expire.

      To continue developing your skills and gain more confidence with the punch needle, I also recommend practicing with the free punchneedle patterns available on my website.

      If you have any questions, suggestions, or need help, feel free to message me on Instagram.

      And don’t forget to share your finished projects and tag @tat.dot — I would love to see your work and share it with the world!